Category Archives: Technique

Crystal Thomas Mosaics’ e-Tutorials

I mentioned in an earlier post that Crystal Thomas allowed me the use of two exercises from one of her e-Tutes for the class I taught in Grafton. I’ll make note that I did specifically ask her for this along with a payment to do so (ie: I didn’t just use them) and I thought it was worth writing a blog specifically on these e-Tutes as I found them so very helpful.

Crystal currently has three tutorials:

  1. A Mosaic Flower Tutorial (Check out her flowers, they are done in a layered style and are just beautiful – I own one!!) US$14!!!
  2. An Andamento and Keystoning workshop (SUPER cool and excellently (is that a word?) explained with a ton of exercises, including the “answers” to those exercises – you simply cannot do without this one!! It will change the way you work for the better!) US$18!!!
  3. Mosaic Skulls 101 (Cyrstal’s mosaic skulls are one of a kind) – US$12.50!!!

You are also able to purchase the Andamento and Keystoning workshop with Crystal’s Top Five Tips. I think it’s great to get tips from different artists. It’s always interesting to know how certain people like to work. Crystal is not currently offering any teaching, either as a group or individually, but does plan to do so again in the future so stay tuned. In the meantime spend next to nothing (seriously all these tutorials are worth more than this!!) and purchase all three tutorials.

detail of 3 Poppies, © Crystal Thomas 2010

“Luis” – Talavera skull, © Crystal Thomas 2009

2 Comments

Filed under Art, Artists, Classes, Crystal Thomas, Flowers, Inspiration, Mosaic, Nature, Ornamental, Technique, Uncategorized, Workshops

Making Mosaics and Lasting Friendships

Well as most of you probably are aware I have become quite friendly with Susan Crocenzi having made a website for her and in return I lovingly welcomed Crossroads into my life. When I was in the USandA I went and visited her in her neck of the woods. How could I not?! The drive up was lovely and I was cursing myself for not hiring the GPS for the extra $14.99 per day cos I kept getting lost?! Mapquest had me all over the place, lol! Finally made it though and she was busy teaching Donna, aka CaDonna, who came to know of Susan through another online forum… They’d been making a polymer clay and tempered glass piece which they’d just finished as I turned up 🙂

Now I will admit to being a tad worried that we might not get along, that it would all be a stereotypical weird online friendship thing and it SOOOO was not. I felt like we’d known each other for a long time. Phew, cos she opened her home to me and was so very hospitable and I stayed for the whole weekend, even got to meet her family. I’m sure you felt the same, a little… huh, Susan?! 🙂

We had planned on trying to go for a hike, there was even mention of going kayaking on the Yuba, which sounded wonderful! There just wasn’t going to be any time though (I was only there for 2.5 days) and I do plan to take her up on the offer another time. Some of the pics I’ve seen of her beautiful surrounds was just mind blowing. Northern CA is just simply beautiful!!! From her studio you could hear the wind in the trees, the river running, birds singing and the air was fresh! It was really just lovely. I could totally see why she lived there. My ideal spot to live is in the mountains overlooking the ocean… Still searching for it. 🙂 In CA, Santa Cruz came very close for me. The Santa Cruz mountains are just… I don’t have words to describe it frankly…

When I asked Susan if there was anything she wanted from Australia, she said the only thing she wanted was a mosaic I’d made. Well, not having all that much left I did have Flutterby which now resides with her 🙂 and I’m so glad it does. I in turn got Big Love… Just what I needed! I own 5 Crocenzi originals now 😉 One would think I’m a fan of her work or something!

Susan was also gracious enough to let me sit in on her 1st class. I think it’s the beginning of a new career for her… Having been a teacher for the last 15 or so years, she’s a natural at it and her classes are fun. Guaranteed you’ll come away from one, or two (?) classes with a piece you’ll love. I know it has made me look at the potential of my mosaics in a different light, which came at a very necessary time as I was feeling rather blah about everything for a while. The combination of the mural intensive, Susan’s tempered glass class and me having just gone on a *major* de-cluttering of my house has got me all enthused again. Nothing like getting rid of crap. It literally clutters your soul and it is so therapeutic to chuck.

Anyway, it was a really fun get-together. Donna is way cool too and her piece she made was gorgeous. Thanks Susan! Thank whatever and whoever for the internet is all I have to say for giving me such great friends, who I can now count as “real life” friends, not just e-friends… 😉
Susan, Donna and me
Susan, Donna & I surrounded by those big gorgeous trees

Me and Donna
Me and Donna

Cabin in the mountains


Aspire, my tempered glass piece I made in Susan’s class 🙂

Big Love
Susan’s trade for Flutterby. I love this piece! It just sparkles and now adorns my love wall…


Donna’s tempered glass and polymer clay piece, Wild Hearts.

April was the month of hearts for me. Everywhere I turned there was one… I had to purchase Laurel True‘s graffiti tag when I saw it:
Laurel True's graffiti tag
It’s about all I could afford, lol!

5 Comments

Filed under Art, Artists, California, Female, Flickr, Furnishings, Inspiration, Kim Grant, Laurel True, Mirrors, Mosaic, Mosaic Materials, My projects, Polymer Clay, Rant, Round the World, Susan Crocenzi, Technique, Tempered Glass, Trades, Travel, Uncategorized, USA, Wall Hanging

A checklist when making mosaics with kids

One of my Flickr friends had asked how I go about making mosaics with kids, so I thought I’d write a post about it…

When I mosaic with kids, I generally let them go. I’ve only ever used ceramic tile with them because it doesn’t get the sharp edges that glass does. Having said that I’ve cut up mirror before for the older ones. If the littlies want to use it I will ask them where to put it and lay it down myself. Mirror for some reason likes my blood. It’s the one material that I almost always cut myself on!!!

We talk about what they want to mosaic and what colours they want to use where and I let them break the ceramic tiles once chosen. Kids of all ages (I’ve now done these with kids from 2 – 8 years of age) love this bit!!!

So far I’ve only ever mosaiced stepping stones with kids. There’s no real reason other than it’s nice to have kids’ artwork in the garden! Probably too, it’s small enough that it doesn’t escape their shorter attention spans and actually has some use. Being a very pragmatic person, I like including my childrens’ artwork in our lives, but in such a way that has some use. Too often the kids will come home with their beautiful artwork, but masses of it and I still don’t know what to do with it all!? I’ve taken to photographing it and making an album of their artwork on the computer. Then it gets recycled, save for those really exceptional ones! I have such a hard time throwing their work away (and to be perfectly honest most of it is in a box under the house, or in those clear-plastic-sleeved folders!) but what do you do with it all!?

Anyway, they draw their image with chalk/crayon etc and interestingly the younger they are the more appropriate their artwork is for mosaics. There’s less detail. I also have to remind them that it should cover most of the area, otherwise you end up with this tiny drawing in the centre of the substrate. If they want a border on the edge then I measure this out for them beforehand and they then draw between the borders.

I let them either butter each tesserae down or put the adhesive down block by block (each section of their design, so that they can still see the design) and let them stick the tesserae down after – this is easier and keeps them interested for longer, but for those kids that take a long time it might not be the method to choose as the adhesive will start to skin over quickly. With the younger ones I help them do the edges so that no sharp bits are overhanging.

I really do it all by feel since some kids could sit there all day long while others only have 10 mins to give. It is important to be as prepared as possible though because the chance of you having to take over is definitely there…

With the sunflower that Molly made, I explained to her that we needed pointy yellow tiles for the petals. She got it no problem! I did have to help a little because her attention span started to wane after an hour 🙂 and so finished off the background for her.

I suppose I could do this all on mesh. I’d say that doing mesh mosaics with kids is really the way to go, but there’s something to be said for kids and instant gratification. Mosaic is a fairly laborious medium and any way that I can keep my kids interested in it, I will use! The nice thing about mesh is that when the kids get bored of it, they can put it down and come back to it later. Also the installation is fairly quick and you don’t need to be concerned with the adhesive starting to get old.

So, to summarise:

  • Choose a substrate first and have it prepped and ready to go.
  • Talk about a suitable design (I always let the kids draw their own work. This to me is so important, not only for their own self esteem but also because you will never be able to replicate the way a child draws. It’s too precious!)
  • Decide on what materials to use
  • Choose a colour scheme. This is another one I don’t interfere with too much (I let them choose from what I have on hand). Kids have the best sense of colour. They’ll put things together that I would never do and it looks great! They have a very fresh colour palette. Or maybe it’s just my kids 🙂
  • If you let them break the tile, make them wear safety glasses and gloves (kids’ gardening gloves work well) and supervise, supervise, supervise! I actually cover the tile up in a rag to minimise flying bits… and explain to them before giving them the tile hammer that waving it around like a madman is bad!!! LOL… Also the tile will break much easier if it is not lying on a flat surface, so laying the tile on two pieces of wood for example can achieve good breaks. You want to break the tile on the non-glazed side BTW 🙂
  • You need to decide if you are going to let the kids butter the back of each tile or spread the adhesive down section by section (which is way faster!), or even use the baggie method. NB: I think if I was doing an interior piece I’d go the weldbond and let them paint it on the back of each tile
  • Be prepared and organised!
  • Let them do it, even when you think they are doing it “wrong”. It’ll always work out in the end and they are so proud of themselves when all is done and finished. AND they will come back for more. That’s the beauty of mosaicing with children!

You can view pictures of some kids’ mosaics on my flickr site.

23 Comments

Filed under Art, Artists, Female, Kids, Kim Grant, Mosaic, Technique, Uncategorized

Table centre sections

Finally I feel like this table is starting to come together. I’m actually very happy, so far, with how it is turning out. I’ve done some of the borders direct and the rest I’ll be doing indirect. I still havn’t glued down these centre sections that I finished the other day. The middle one made me work for my money! I diluted the glue too much and ended up having to redo most of it… I suppose that’s what keeps us humble. 🙂 Anyway, I’m now doing the small half circles and then it’ll be mostly done! I have given up on the idea of getting this finished before my trip OS. There’s no way I can do it. I couldn’t have chosen a worse time to be going on holiday actually. Work is busy – I have two huge events I’m organising for when I get back (Fun!!!). This commission ended up being handed to me now and my studies have had to be put on hold. I am so relieved with that! It got to the point that I was really not enjoying it any longer.

Centrepieces done

A bit of bling

I decided to go with a little bling here. I couldn’t help myself 😉 Plus it’s not like it is brash and unappealing… I felt like it needed something more to it. Anyway, back to do more.

2 Comments

Filed under Art, Artists, Australia, Business, Canberra, Female, Flickr, Furnishings, Kim Grant, Lifestyle, Mosaic, My projects, Round the World, Table, Technique, Uncategorized, Works in Progress

How to make mosaics – a Beginner’s Guide

There is a chinese proverb that goes like this:

I hear and I forget
I see and I remember
I do and I understand

Someone left a comment asking how to begin making a mosaic which then prompted me to decide to write a quick guide of what to do, where to go etc… I’m not going to tell you how to make a mosaic with step-by-step instructions. A simple google search can do this for you. What this post aims to do is to give you a quick overview and let you know the resources available for you to get started. At the end of the day, most mosaicists are self-taught, myself included. I started simply by going to the bookstore and happening on a mosaic book that I took one look at and thought: I can do that! After that, it was inspiration taken from my surroundings and the internet. That’s it! It took about a year and a half before I realised that there is a load of information out there on mosaics and that the worldwide mosaic community is in fact very, very small! So this is what I have found and what I think everyone who wants to start making mosaics ought to do!

Making a mosaic is really a 4 step procedure. You have your design step, then the tiling step (gluing down your tesserae), grouting and finally sealing.

Begin with finding inspiration. For me it was by accident, and finding a book on mosaics at the bookstore. There are many books at your local library, most of which give you step-by-step instructions. Read it, be inspired, find something you like and that you think you can do. I wouldn’t say: don’t start with a mural! However, a mural is a little more complex since it’s on such a larger scale. Might be nice to start with something smaller and feeling the satisfaction of finishing a piece before the frustration sets in 😉 Kids’ illustrations are in fact a great choice for mosaics. Look in your childrens’ colouring books. The simpler, the better. You don’t want to start with a picture that has too much detail.

You need to then decide what you want to mosaic. Is it going to be an interior piece, or an exterior piece? This will largely determine the substrates chosen, aswell as the adhesives you choose.

For an interior piece, mdf or plywood are OK to mosaic on as long as it won’t be hung in a room that is very humid (like the bathroom!). However both these surfaces need to be sealed otherwise you will have problems later on in grouting. The surface will wick all the moisture out of the grout, which can cause problems like the grout cracking etc… Adhesives to choose can be as varied as using the traditional cement-based adhesive also known as “thinset”, or a strong PVA like Weldbond. Some people even use silicone, though this is more common for glass on glass projects and even liquid nails. I suppose you can ask yourself, how long do you want your piece to last, can you spend hours on a piece, or do you have spits and spats of time here and there?

More consideration needs to be given to an exterior piece since it is outside in the harsh elements! Your choice of glues, in my opinion, is much more limited as it needs to have the ability to withstand being outside. If you are working on a piece that will be fully immersed in water, then this also needs to be considered. I say avoid wood all together. There is too much movement in woods these days, since they are sold so green. But some people use marine ply and are happy to do so. Again, the choice is yours. I have used mdf that I sealed with a special sealant that apparently lets it stay intact outdoors. It’s been a couple years and so far so good, but we’ll see…

I could write about the choices of adhesive but they are just so vast, and it’s not what this post is really about. Find one that is not only suitable to your project, but one that you like using!

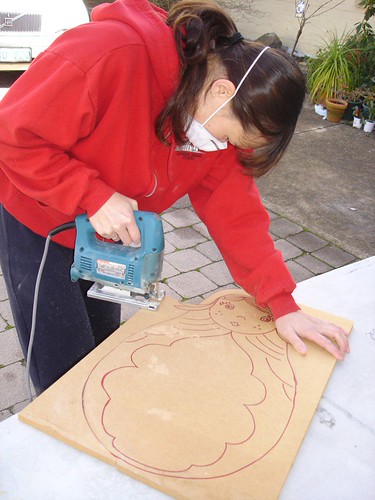
The next step is choosing your tile and laying it down. How are you going to cut it? Do you want to just smash tile with a hammer, or do you want to cut the shapes out? In either case, think safety first and cover up your eyes (and your kids too if they are hanging around!). Look into tile nippers for cutting your tile, wheeled glass cutters if you are using glass and a glass cutter too. If you are serious about mosaics then having some basic tools are invaluable. That said, a simple hammer will do the trick for smashing tiles.

Have loads of fun gluing the tile! After drawing your design out onto the surface, start laying the tile down in the foreground. Generally speaking the background is filled in last. Well, that’s common sense really!!! 🙂 After you have finished gluing all your tesserae, you need to let it dry atleast 24 hours.

Once dried, you can then proceed to grout your piece. Grouting will bring the whole piece together.  Just follow the manufacturer’s instructions for this. Grouting is easy once you get the knack of it, but beware it can be messy! I’d also advise to use gloves. It is a cement based product and will dry your hands right out! It is important to let the grout dry out of the sun. Don’t ever try to speed the process up. It needs time to do it’s thing. A couple tips: always let the grout slake. That is, after you have mixed the grout up to a toothpaste consistency, let it sit for around 5 minutes (read instructions) before stirring again and applying. It’s an important step that alot of people skip. Also, if you care about your plumbing never, ever clean off your grout bucket down the sink! It’ll be an expensive and painful exercise… Keep in mind too that your grout has a limited working time. You need to make sure you set aside plenty of time to grout and polish your piece. Finally,white is not a neutral tone when it comes to grouting. I would never use white grout on a mosaic. I’m yet to see a piece that has been grouted white where I actually like it. It can always look better in a grey or vanilla, if you’re looking neutral.

3 days after having grouted, seal your projects with a grout sealer. Seal them even if you are leaving them inside. Sealing is good. Sealing is your friend.

That’s it in a nutshell! So get crackin’! Each step goes into much more involved and detailed steps so I highly recommend joining some online mosaic communities. There is a ton of information in their files and if there isn’t, then ask. Mosaic Addicts and Mosaic Artists Org are both yahoo groups. It’s easy to join and start participating in the online forums. Another more obvious place to look is for classes in your local community. There is usually always someone out there teaching mosaic.

I’m a big believer in learning through doing… Hope this helps some of you get started!

38 Comments

Filed under Art, Artists, Australia, Canberra, Female, Inspiration, Kim Grant, Mosaic, My projects, Round the World, Technique, Uncategorized, Works in Progress

Table on the go

Yesterday I got stuck into this table. Very exciting as it is now starting to come to life. Hopefully the tiles will be in shortly so I can continue on it. For now I’m just happy to have the pattern transferred.

I started outlining some of the borders directly. I think it will end up being partially direct, partially indirect. Thankfully I have a steady enough hand that when I work direct I can generally get a good, even surface. I brought the table inside because it’s too bloody cold outside to work, and I’ll be working on this mostly at night. There was no way I was going outside, at night to work in a Canberra August! So it’ll be interesting when we go to take it out of my studio 😉 It’s so heavy as it is!

I’m excited about this though now. I wasn’t feelin’ the lurve before, but now that I’m starting it’s feeling good. I’m just anxious to get moving on it.

Transferring pattern

Enlarging the pattern. There are various ways to do this and I think everyone has their way that works best for each different application. With this one I went the old fashioned way of measuring everything out using a ruler and keeping things square with a homemade chalk line. They’re the best! This method of enlarging is easy to do on a flat surface like this…

Some tiles down

Leave a comment

Filed under Art, Artists, Australia, Business, Canberra, Female, Flickr, Furnishings, Garden Mosaics, Kim Grant, Mosaic, My projects, Round the World, Table, Technique, Uncategorized, Works in Progress

One of my current WIPs

The deadline for the Mosaic Symposium is coming up. I decided a little while ago that I wouldn’t put anything in because time is an issue currently. Well, the other day I changed my mind, probably because I really am a glutton for punishment. I just submitted some work to Art Sydney 07 and have decided to submit some work into the Mosaic Symposium being held in Tasmania this year. Unfortunately, I will miss it. Going OS – my first travels alone since having the kids. Very exciting, a little worrying too though…

Anyway, so after deciding that I will put something into the exhibition I got to thinking what?! I was going to put in Kashmir, but then I sold it. So I thought I’d do a babooshka. Something that’s been playing around in my head for some time now. I don’t know how I feel about her right now… She’s way to cutesy for my liking. But admittedly my pieces change sometimes considerably throughout the process, so I guess we’ll see. Just hope I can finish her before the 20th!!!

This is also my first “face”. I mentioned before that portraiture is not my strong point, never has been. I’ve found mosaic to be very forgiving, in that I can use patterns and shapes as opposed to having to be “artistic” if you know what I mean. Perhaps why I have found my medium!

Babooshka, drawn

Here I’ve drawn the outline of the shape.

Babooshka, cutting out

Cutting out the shape with  the best birthday gift ever… that I gave to my husband (!) 😉 I really need to get that rated mask!

After sealing it, I start to mosaic.

Babooshka, to be

See!? Too cutesy. I have to keep telling myself to be patient. I guess worse comes to worse, I just won’t enter it.

Leave a comment

Filed under Art, Artists, Australia, Babooshka, Canberra, Events, Exhibitions, Flickr, Glass, Kim Grant, Mosaic, My projects, Round the World, Technique, Uncategorized, Wall Hanging, Works in Progress